Posted by Kejia:
Meringue happens to be one of my favorite things to bake because they're so super simple and quick, requiring little effort and ingredients - and they taste amazing, too. Everyone would recognize that crunchy exterior coupled with the chewy goodness in the centre. What's more, this recipe calls for chocolate chips. So imagine that crunch, that gooey-ness, plus that melty chocolate.....mhmm. This is one recipe you definitely have to try out(or you know, you could just make friends with me) in order to sink into the pleasure of these little kisses.
The great thing about baking meringue is that it is so easy to just eyeball the perfect timing to take them out of the oven. My oven's kind of screwed up sometimes because it can't get the right temperature(or maybe because it just sucks), so usually the timing stated in the recipes doesn't work for me. ;-( Thus, I tend to guess when to take out my baked products. But for meringue, it's so easy(Phew!!!). When it becomes dry on the surface, no longer glossy - that is the perfect time to take them out. They should slide off the baking sheet easily as well and not stick to it when you try to remove them.
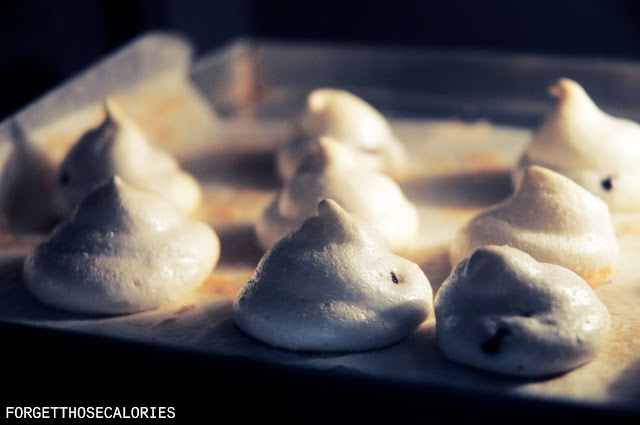
As for the colour, here's what! Simple tips on how to get the meringue colour you desire. If you want your meringue to be slightly brown, increase the heat in your oven, decrease the time the meringues are put in the oven. If you want pretty, white meringues, decrease the heat, and increase the time(this can take up to an hour). I tried both out and as you can see from the two pictures below, the colour of the meringues are different. Some people want their meringues to be brown(I even googled people who used blowtorches on their meringues) and some want them to retain their original colour(for e.g. if you put some violet food colouring you don't want your meringues to turn brown ew). Of course, it all depends on the size of the meringue...so as I've said, just eyeball it you can't go wrong. ;-)

Love,
Kejia ^_^
As for the colour, here's what! Simple tips on how to get the meringue colour you desire. If you want your meringue to be slightly brown, increase the heat in your oven, decrease the time the meringues are put in the oven. If you want pretty, white meringues, decrease the heat, and increase the time(this can take up to an hour). I tried both out and as you can see from the two pictures below, the colour of the meringues are different. Some people want their meringues to be brown(I even googled people who used blowtorches on their meringues) and some want them to retain their original colour(for e.g. if you put some violet food colouring you don't want your meringues to turn brown ew). Of course, it all depends on the size of the meringue...so as I've said, just eyeball it you can't go wrong. ;-)
Meringues with a slight brown colour, pretty suitable for the chocolate chip meringues.

Completely white meringues with the same crunchy exterior and chewy interior(this picture is a bit weird-looking because it was taken under low light conditions because they took so long in the oven the sky turned dark HAHA). Un-browned meringues are suitable for if you used a specific food colouring and don't want the slightly burnt-looking effect.
Recipe adapted from Verybestbaking
Ingredients:
4 large egg whites
1/2 teaspoon salt
1/2 teaspoon cream of tartar
1 cup granulated sugar
2 cups chocolate chips
1. Preheat oven to 150ºC. Line baking pans with baking paper.
2. Beat egg whites, cream of tartar and salt together until soft peaks form.
3. Gradually add sugar, beating until stiff peaks form. That's a sexy stiff peak right there.
4. Gently fold in the chocolate chips 1/3 cup at a time.
5. Pipe or drop some of the mixture onto the baking paper.
6. Bake for 20-25mins until meringues are dry and crisp. Cool, and transfer to store in air tight containers.
If you love meringue like I do and cannot resist buying beautifully packaged meringue from classy shops like Canele then you should totally learn how to bake them because it would be 100x cheaper and produces so much more meringue for you to eat :-D Hope you guys will try this out, and that the information provided was helpful :-)
Love,
Kejia ^_^


Yum, these sound so delicious!
ReplyDeleteThank you so much! We hope that you'll try this out. :-)
DeleteHey! They should not be sticking to the pan after removal from the oven but rather slide off easily. If you like them to be chewy(I do) then just follow the timing(20-25mins) and temperature stated above. If you like them to be fully crisp then leave them in the oven for a longer period of time(about 1 hour) under lower heat settings. :-) Hope this helps.
ReplyDelete